
Christmas is just around the corner and the kids are getting excited! Why not help them get ready even more with these fun Christmas craft ideas for kids.
Why Christmas Crafts Matter for Families
Crafting isn’t just about the glitter and glue (though those are pretty awesome). Here’s why DIY holiday moments are worth it:
- Boosts creativity and confidence
- Creates lasting memories
- Develops fine motor skills
- Provides screen-free quality time
Christmas Craft Ideas Sorted by Age Group
Toddler-Friendly Christmas Crafts (Ages 2-4)
Little hands, big holiday fun!
- Handprint Reindeer Art
- What You’ll Need: Construction paper, brown paint, googly eyes, red pom-pom
- Why They’ll Love It: Messy hands + adorable results = winning combo!
- Steps:
- Paint your toddler’s hand with brown paint and stamp it onto the paper (hello, reindeer!).
- Glue on googly eyes and a red pom-pom nose.
- Write the date for a keepsake you’ll cherish forever.
📝 Pro Tip: No pom-poms? Use red marker or cut out a red circle from paper.
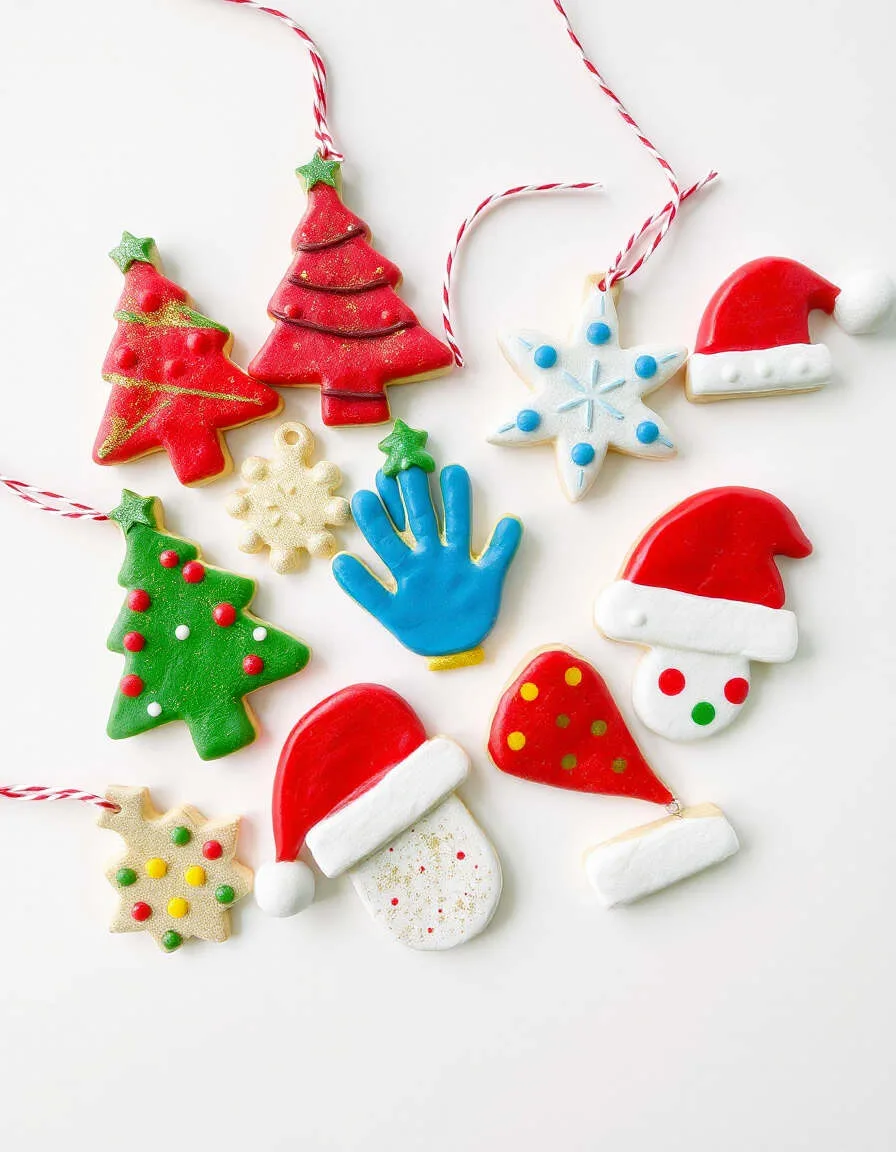
- Salt Dough Ornaments
- What You’ll Need: Flour, salt, water, cookie cutters, ribbon
- Why They’ll Love It: Smush, shape, and paint—it’s tactile fun from start to finish.
- Steps:
- Mix 2 cups flour, 1 cup salt, and 1 cup water to make dough.
- Roll it out and use cookie cutters to create shapes.
- Poke a hole for string and bake at 200°F for 2-3 hours.
- Let the kids paint their ornaments once cooled.
🎨 Mess Alert: Cover your table with a plastic tablecloth for easy cleanup.
- Paper Chains
- What You’ll Need: Strips of colored paper, glue stick.
- Why They’ll Love It: They can see their chain grow with every loop they add!
- Steps:
- Pre-cut strips of paper in festive colors.
- Show your child how to loop one strip and glue the ends to form a circle.
- Repeat, linking each circle through the previous one.
🎨 Parent Tip: This activity helps toddlers practice fine motor skills while creating something they can proudly display.
- Decorate Fingerprint Christmas Trees
- What You’ll Need: Green cardstock, paint, markers, stickers (optional).
- Why They’ll Love It: They can personalize their “tree” with tiny ornaments!
- Steps:
- Draw a simple Christmas tree shape on green cardstock.
- Dip their fingers into paint and press onto the tree as ornaments.
- Use markers to add garlands or stars, or let them stick on mini stickers.
🎉 Variation: For less mess, skip the paint and use colorful dot stickers instead.
- Paper Plate Santa
- Materials Needed: Paper plates, red and pink construction paper, cotton balls, googly eyes, glue, scissors.
- Why They’ll Love It: Combining textures and shapes makes for a fun, hands-on activity.
- Steps:
- Cut a triangle from red construction paper to form Santa’s hat and glue it to the top of the paper plate.
- Glue cotton balls along the bottom edge of the hat and at the tip to create the fluffy trim.
- Attach googly eyes below the hat on the paper plate.
- Cut a small circle from pink construction paper for the nose and glue it below the eyes.
- Glue cotton balls around the edge of the plate to form Santa’s beard.
🎨 Variation: Use colored pom-poms for the nose and hat trim for added color.
- Cotton Ball Snowman
- Materials Needed: Cotton balls, black and orange construction paper, glue, cardstock.
- Why They’ll Love It: They get to feel the soft cotton balls while practicing their fine motor skills by gluing and arranging shapes.
- Steps:
- Draw three circles (a snowman) on cardstock.
- Let your toddler glue cotton balls inside the circles.
- Cut and glue small black circles for eyes and buttons, and an orange triangle for the nose.
🌟 Eco Tip: Use scrap cardboard as a base to make it sturdier and eco-friendly.
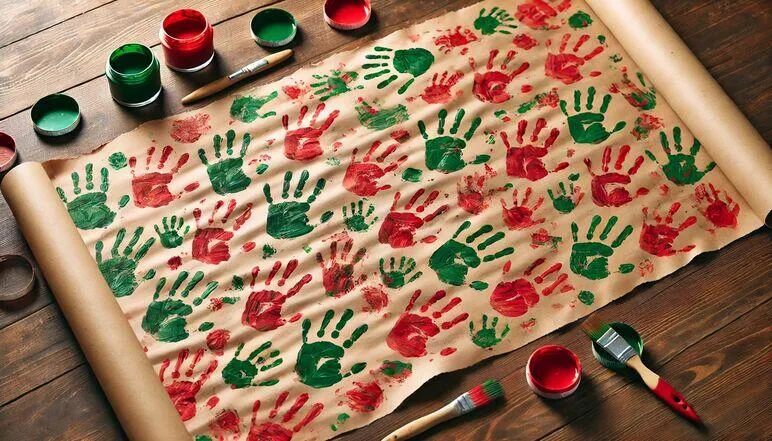
- Handprinted Wrapping Paper
- Materials Needed: Large sheets of plain paper, washable paint, sponges, brushes.
- Why They’ll Love It: They can create personalized wrapping paper for gifts.
- Steps:
- Spread out large sheets of plain paper on a protected surface.
- Pour washable paint into trays and use sponges or brushes to apply paint to your child’s hands.
- Let them press their painted hands onto the paper to create handprint designs.
- Allow the paint to dry completely before using the paper to wrap gifts.
🌟 Eco Tip: Use recycled brown paper bags as the base for an eco-friendly option.
School-Aged Kids (Ages 5-10)
Big imaginations, slightly less messy!
- Cinnamon Stick Trees
- What You’ll Need: Cinnamon sticks, ribbon scraps, string
- Why They’ll Love It: Smells like Christmas and looks adorable!
- Steps:
- Cut 7 ribbon pieces, each longer than the one before.
- Tie the shortest ribbon at the top of the cinnamon stick and continue with longer ones as you go down.
- Attach a string loop at the top to hang.
🌟 Eco Tip: Use old fabric scraps instead of buying ribbon!
- Candy Cane Reindeer
- What You’ll Need: Candy canes, brown pipe cleaners, googly eyes, red pom-poms
- Why They’ll Love It: Sweet, simple, and they double as gifts!
- Steps:
- Twist a pipe cleaner around the candy cane to create antlers.
- Glue on googly eyes and a red pom-pom nose.
🎉 Gift Idea: Kids can hand these out to friends or teachers—instant holiday joy.
- Accordion Christmas Trees
- What You’ll Need: Green paper, scissors, glue, a stick or straw for the trunk.
- Why They’ll Love It: Folding the paper creates cool layers, and they can show off their fine motor skills.
- Steps:
- Cut green paper into strips of varying lengths.
- Fold each strip accordion-style.
- Stack and glue the folded strips, with the largest on the bottom and the smallest on top.
- Attach a stick or straw as the tree trunk.
🌟 Pro Tip: Add glitter or a shiny sticker at the top for a festive touch!
- Christmas Tree Bookmarks
- Materials Needed: Green cardstock, markers, stickers.
- Why They’ll Love It: It’s a quick, fun project, and they’ll have a cute bookmark to use for holiday storybooks.
- Steps:
- Cut green cardstock into a narrow triangle shape.
- Decorate with markers or stickers.
- Punch a hole at the top and tie a ribbon for a festive touch!
🎨 Variation: Add small rhinestones or glitter glue for extra sparkle.
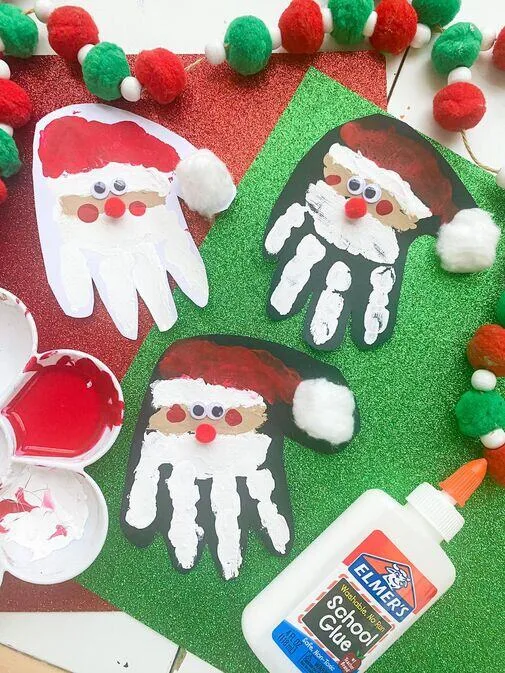
- Handprint Santa
- Materials Needed: Red and white construction paper, googly eyes, cotton balls, glue, scissors.
- Why They’ll Love It: Transforming their handprint into Santa is both fun and personal.
- Steps:
- Trace your child’s hand on red construction paper and cut it out.
- Position the handprint with fingers pointing down; the thumb and pinky will be Santa’s arms.
- Glue cotton balls along the base of the fingers for the beard and at the tips for the hat’s trim.
- Attach googly eyes and draw a nose and mouth on the palm area to create Santa’s face.
🎅 Variation: Use felt instead of construction paper for a different texture.
Read more: If you’re searching for inspiration, check out these Christmas gift ideas for kids that will light up their faces on Christmas morning!
Tweens & Teens (Ages 11+)
Cool crafts for too-cool-for-crafts kids.
- Felt Candy Cane Ornament
- What You’ll Need: White felt, red ribbon, needle & thread or craft glue
- Why They’ll Love It: It’s trendy, cute, and totally giftable!
- Steps:
- Cut two identical candy cane shapes from felt.
- Sew them together with a simple loop stitch, or glue if sewing isn’t your thing.
- Decorate with red ribbon stripes.
✂️ Skill Builder: Great intro to sewing for beginners!
- Thumbprint Christmas Tree Art
- What You’ll Need: White cardstock, green paint, markers
- Why They’ll Love It: A modern twist on finger painting.
- Steps:
- Use green paint fingerprints to create a tree shape.
- Add colorful “ornaments” with more fingerprints.
- Finish with a star drawn on top.
📸 Photo-Worthy Idea: Frame it for grandparents as a handmade gift.
- Yarn-Wrapped Christmas Trees
- What You’ll Need: Cardboard triangles, green yarn, glue, mini pom-poms.
- Why They’ll Love It: Wrapping yarn is relaxing, and the results are totally display-worthy!
- Steps:
- Cut cardboard into triangle shapes.
- Wrap green yarn tightly around the triangle, covering it completely.
- Secure the yarn at the back with glue.
- Decorate with pom-poms, sequins, or mini ornaments.
🎨 Advanced Option: Mount the trees on popsicle sticks to create a festive forest.
- Cardboard Wreath
- What You’ll Need: Cardboard, green paint, tissue paper, glue, decorations (optional).
- Why They’ll Love It: Turning plain cardboard into something magical is always a hit.
- Steps:
- Cut a large circle from cardboard and cut out the center to form a wreath shape.
- Paint the cardboard green and let it dry.
- Crumple tissue paper into “leaves” and glue them onto the wreath.
- Decorate with beads, stickers, or ribbons.
🌟 Eco Tip: Recycle cereal boxes for the base!
- Snow Globes
- What You’ll Need: Mason jars, small figurines, glitter, glycerin, hot glue.
- Why They’ll Love It: Watching glitter swirl in their homemade globe is mesmerizing.
- Steps:
- Glue a small figurine to the jar lid.
- Fill the jar with water, a dash of glycerin, and glitter.
- Screw on the lid tightly and shake to watch the snow swirl.
🎉 Caution: Always supervise kids when using hot glue or glass jars!

- Felt Candy Cane Ornament
- What You’ll Need: White felt, red ribbon, needle and thread (for kids who sew), craft glue (for non-sewers)
- Why They’ll Love It: Beginner-friendly sewing teaches kids basic hand-stitching skills, and it can be easily adapted for non-sewers. Plus, they’ll have a cute ornament to hang on the tree!
- Steps:
- Stack two pieces of white felt and cut out a candy cane shape.
- Sew the edges with a loop stitch or glue them together with craft glue.
- Cut red ribbon into strips and glue diagonally as stripes.
🎨 Variation: Add glitter glue or small felt holly leaves for extra decoration.
- Pasta Wreath
- What You’ll Need: Assorted dry pasta, spray paint, cardboard, glue.
- Why They’ll Love It: They get to design and paint an elegant wreath from scratch.
- Steps:
- Arrange dry pasta into a wreath shape on cardboard and glue in place.
- Spray paint the wreath gold, silver, or a festive green.
- Add a ribbon or bow for a finishing touch.
🌟 Style Tip: Experiment with pasta shapes for a unique design!
Troubleshooting Tips for Busy Parents
- Missing Supplies? No googly eyes? Draw them on! No cookie cutters? Freehand shapes with a butter knife.
- Mess-Control: Lay down newspapers or a reusable craft mat to catch spills.
- Uncooperative Kids? Let them take charge of decorating finished crafts with stickers or markers.
Ready to Spark Holiday Magic?
We’d love to hear how these festive craft ideas work for your family! Do you have a favorite project, or perhaps a beloved holiday tradition like playing Christmas games for kids that makes your season extra special? Or maybe you’ve got a go-to set of funny Christmas jokes that always gets everyone laughing? Let’s keep the inspiration flowing—drop a comment below to share your story and spread a little more Christmas cheer!
✨ What are your family’s favorite Christmas crafts? Share in the comments and inspire fellow parents!