

A Great Craft for Recording Your Adventures!
For many families, summer marks the season of travel. From road trips to overseas adventures, many of us will return home with a nice suntan, passports full of stamps and hundreds of photos. But when the kids are back in school, schedules have returned to normal and the photo albums begin to collect dust, it becomes hard to remember those special moments.
That’s why there’s no better way to keep your family adventures alive than with a DIY pushpin travel map. It’s the perfect way to showcase your memories, plan for upcoming travels and dream up new destinations.
Store bought pushpin maps are often costly, and purchasing one can lack the sentiment that goes into creating your own. To solve for this, Car Rentals created this beautiful step-by-step guide, below, that walks you through how to create your own pushpin travel map, unique to both your living space and budget.
This simple DIY guide makes the process a breeze and takes 2-3 hours to complete. To make it even more budget-friendly, included are a handful of free pinning legends that match several map aesthetics, so if you’re ambitious, you can create an extra to gift!
Materials
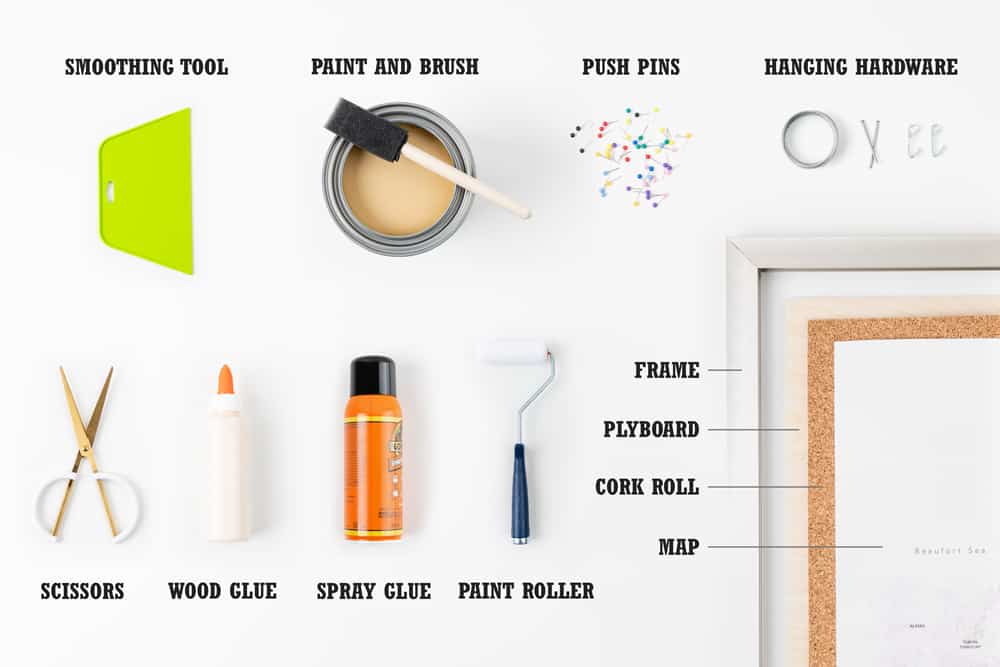
- Map: The size of your map will determine the other materials you need for the project. While there are many options out there, we chose a 24”x36” map, which is considered the size of a typical poster.
- Cork roll: Since you will be using push pins to mark each location, consider the size and thickness you will need for your cork backing. Cork comes in rolls, squares and pre-made boards. For the 24”x36” map, we used a 1/4” cork roll. Another option is to use a foam board, but we found that cork holds up better over time.
- Plyboard: Cork is not sturdy enough on its own to support the map while hanging, so you’ll need a plyboard backing. Consider the thickness of the plyboard so it doesn’t take up too much space in the frame. It should also be the exact dimensions of your map. If you’re unable to find your desired size through online retailers, you may need to cut your own or have it cut for you at your local hardware store.
- Frame: Your frame should match the dimensions of your map.
- Scissors: You will need scissors or a precision knife to cut the cork to match the dimensions of the plyboard. Make sure the blade is sharp to prevent tears.
- Paint: Choose a paint color to match with the details of the map. For our map, we used a gold satin paint to give the appearance of a metal frame.
- Paintbrushes: The size and material of the frame will determine what kind of brushes you need. We used 1” foam paintbrushes for this project.
- Paint roller: We recommend using a foam paint roller to apply the glue to the corkboard. It helps save time and allows you to generously apply the glue to a large surface area with ease.
- Adhesive: Use a strong adhesive that dries flat and doesn’t expand. We used two kinds of glue — wood glue to adhere the cork to the plyboard and spray adhesive to bond the map to the cork.
- Hanging hardware: This often comes with your frame, but if not, purchase hanging hardware at your local arts and crafts or hardware store.
- Smoothing tool: This is used to remove any air bubbles or lumps from the map when glued to the corkboard.
- Push pins: Use these to pin each location on the map. Consider what kind of pinning system you will use: different shapes, matching pins, color-coordinated pins or a combination of both.
Step 1: Cut the Cork
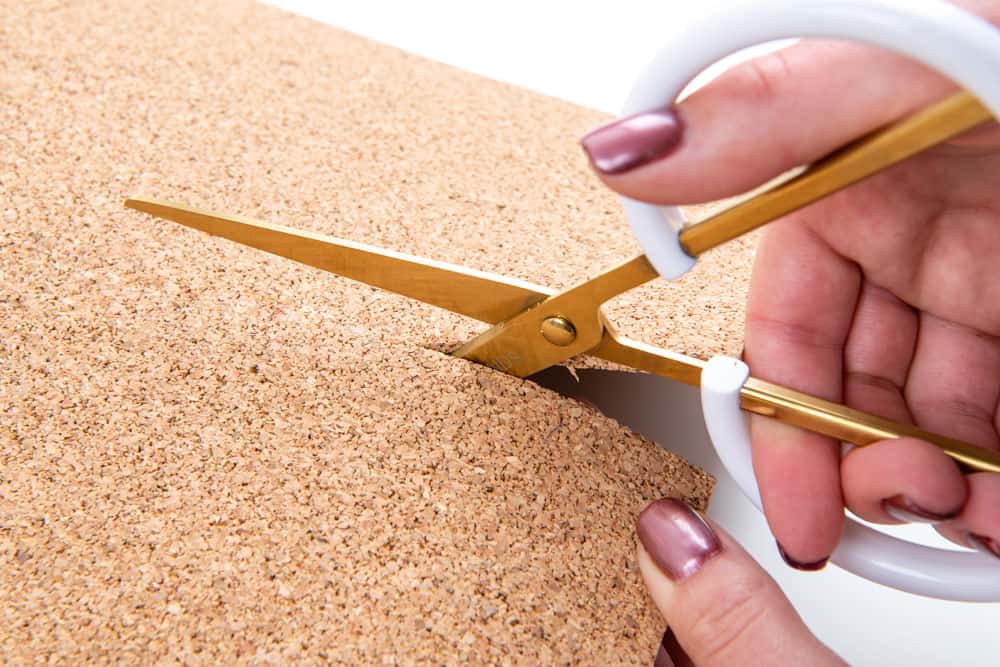
Spread out the cork roll and use a tape measure to match the dimensions of the cork to those of the plyboard, which in our case is 24”x36”. Mark the dimensions on the cork and begin cutting.
Cork has a tendency to be rather delicate, so be sure to take extra care when cutting the roll to prevent unintended rips or tears. Make sure to use sharp scissors or a precision knife to create a perfect edge.
Step 2: Adhere the Plyboard to the Cork
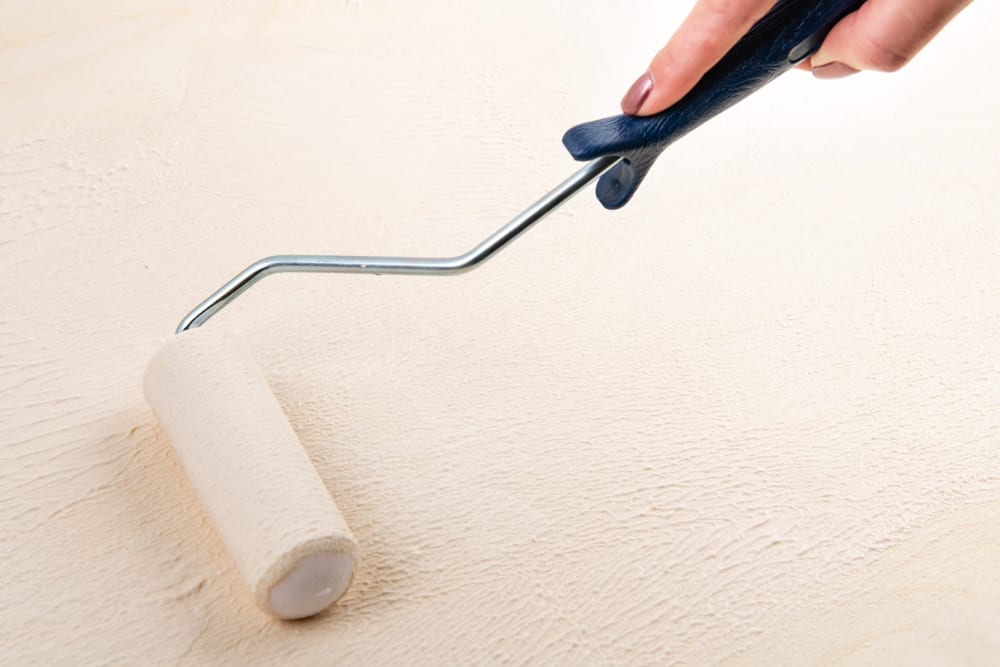
Pour glue into a plastic container and then use a small paint roller to apply generously to the plyboard. This will help evenly distribute the glue and prevent lumps when it dries.
Pro Tip: Cork is very absorbent, so make sure you apply a generous amount of glue. Use an adhesive like wood glue to ensure a strong hold.
Step 3: Adhere the Corkboard to the Map
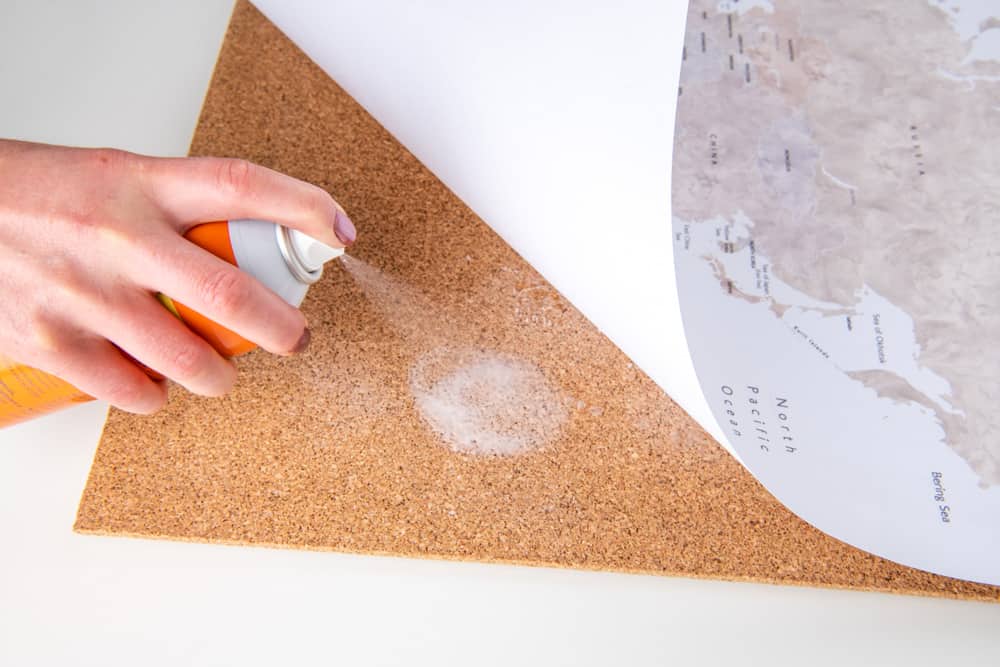
Use spray adhesive for this step, as it will dry evenly and prevent the map from warping. Be sure to spread the glue evenly so there are no visible lumps when the glue dries. Since cork is very porous, make sure it’s tacky to the touch before you place the map down; however, be cautious of using too much glue to prevent it bleeding through the map.
Step 4: Smooth Out the Air Bubbles
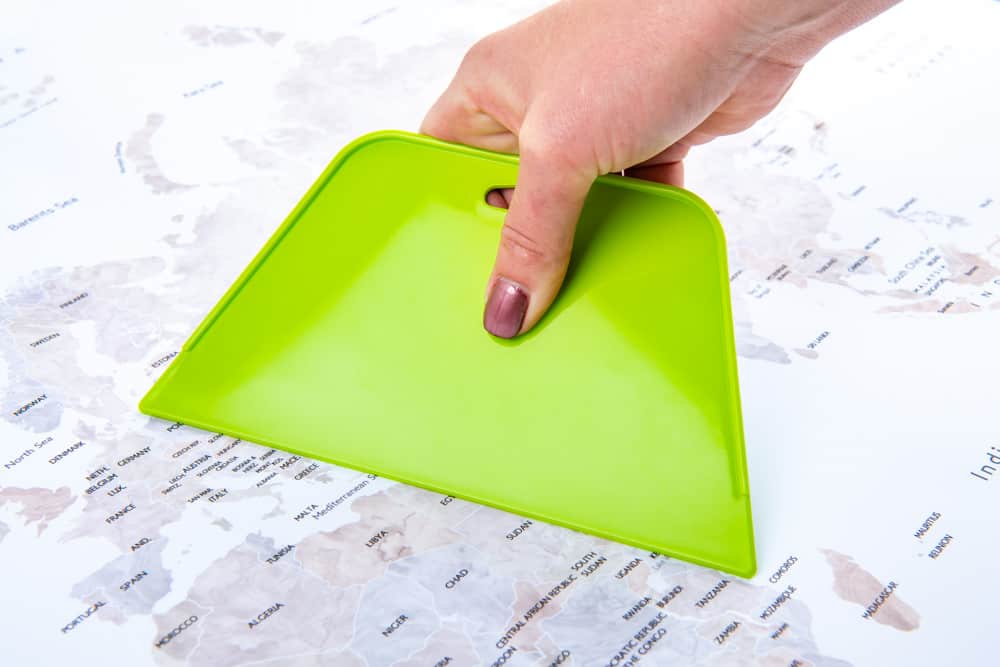
Run a smoothing tool over the surface of the map to evenly distribute the glue and remove any air bubbles. Be extra gentle so as not to tear or puncture the map. Be sure to use a tool that doesn’t have sharp edges and won’t leave marks on your map.
Step 5: Place Heavy Items on Top
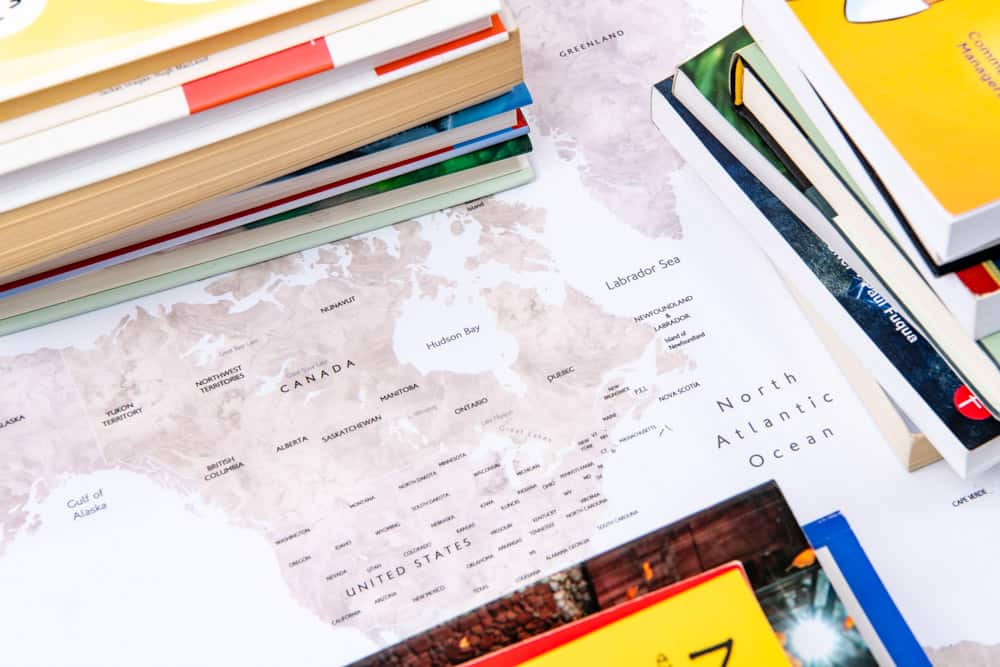
The weight of heavy items will help bond the map to the cork and the cork to the plyboard while preventing any indents or tears in the map. You can use the glass piece of the frame to keep the map flat and add weight with books. Let this sit for approximately an hour.
Step 6: Paint Your Frame
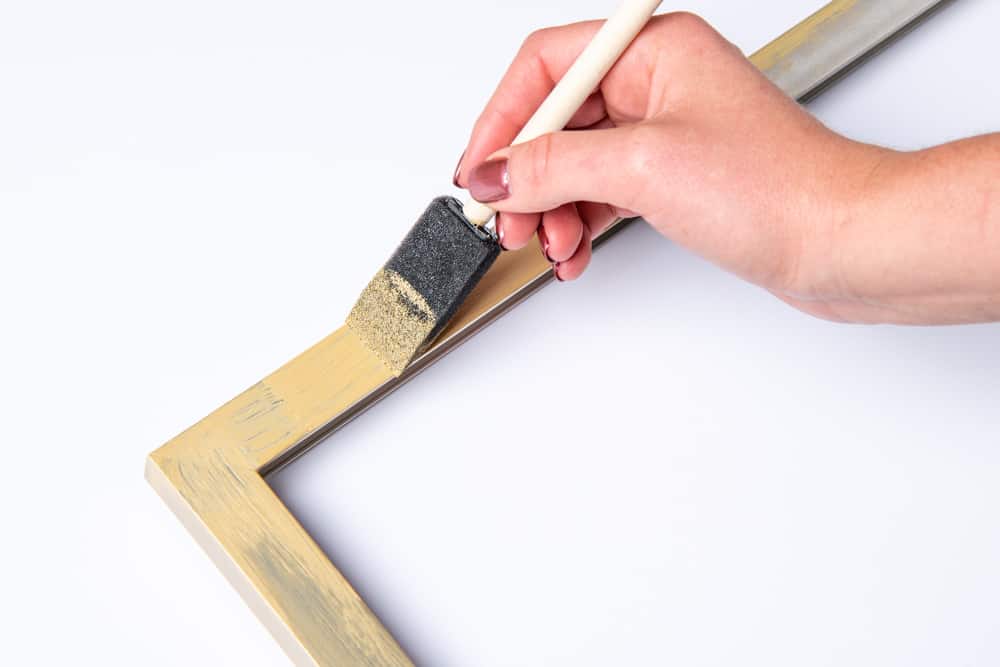
While you leave the map portion of your project to dry, it’s time to paint the frame. The type of paint you use and the material of your frame will determine how long it needs to dry — let sit for 30 minutes to an hour.
Pro Tip: Having a variety of brush sizes will allow you to get in the crevices of the frame. It’s always a good idea to give the frame a second coat for a finished look.
Step 7: Place Map Inside the Frame
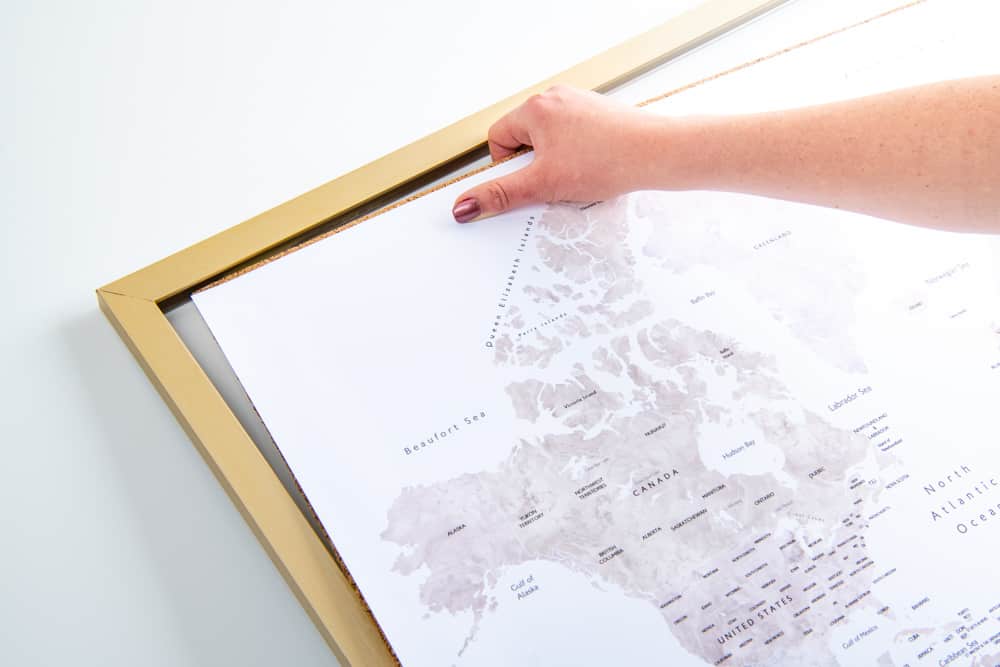
After your frame has dried, it’s time to place the map with the attached cork backing inside the frame. This step will look different depending on the type of frame you buy. Be cautious to not scuff or bend the edges of your map during the process.
Step 8: Determine Your Pinning System
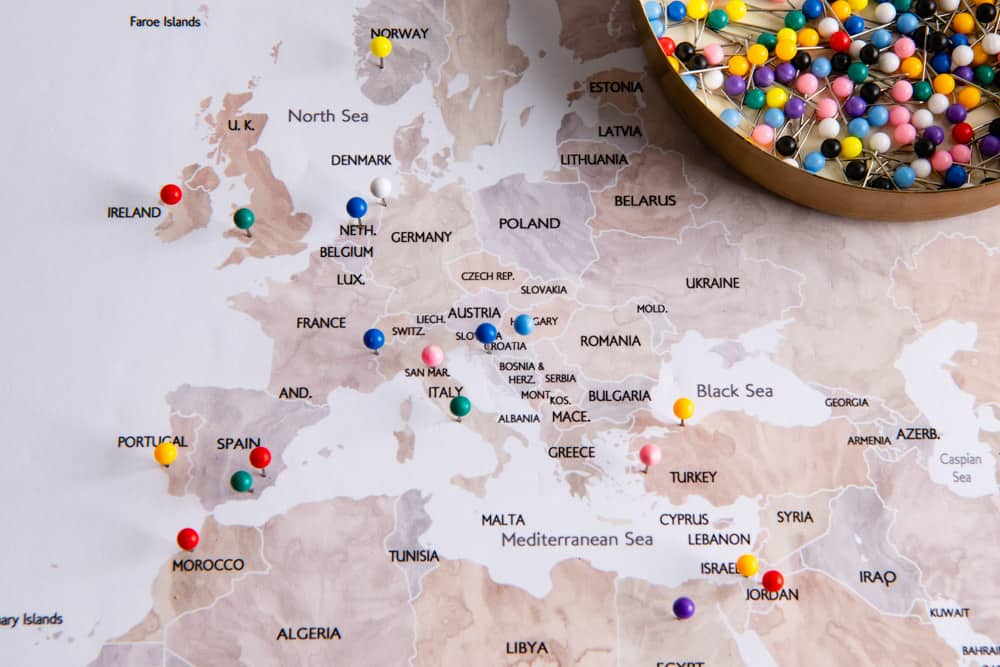
There are many ways you can pin your travels, like using different colored pins that correspond with past adventures, locations you plan to visit soon or dream destinations. If you travel often, your map may get congested, so consider only pinning countries versus every city.
Step 9: Print Your Pinning Legend
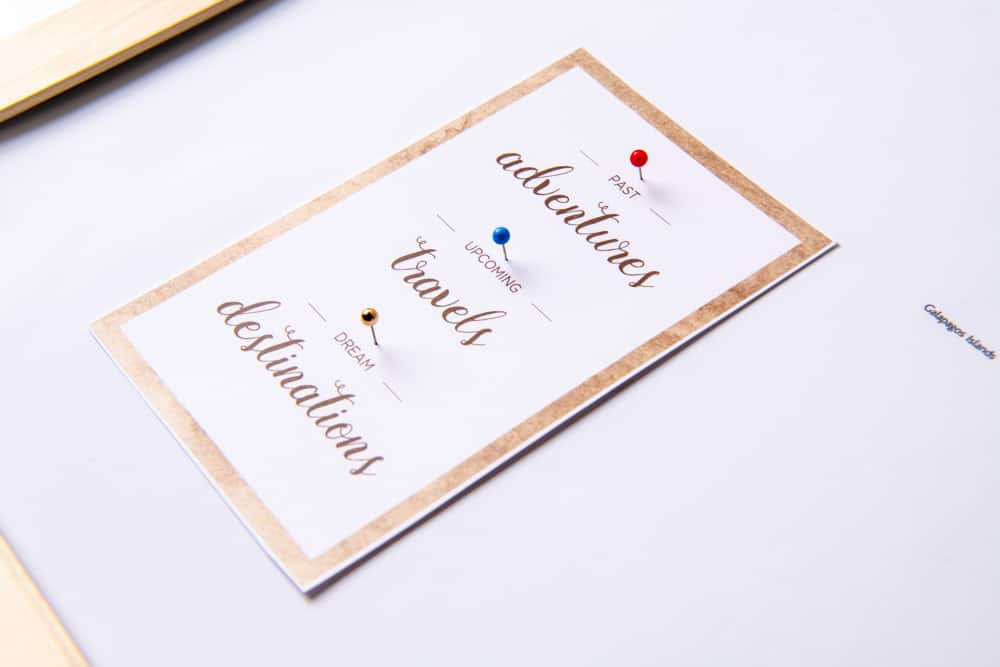
Once you’ve established your pinning system, it’s time to download and print out one of our pinning legends to add to your map. With six unique styles to choose from, print out the legend color and theme that best matches your map’s style. Glue it to the corner of your map and mark with push pins to represent your past travels, upcoming adventures and dream destinations.

Once you’ve established a pinning system and chosen one of our pinning legends that correspond with your map, you can start mapping out your travels and planning for upcoming adventures. As time goes on, you can watch the collection of pins grow and remember your trips around the globe.
Step 10: Hang up Your Map
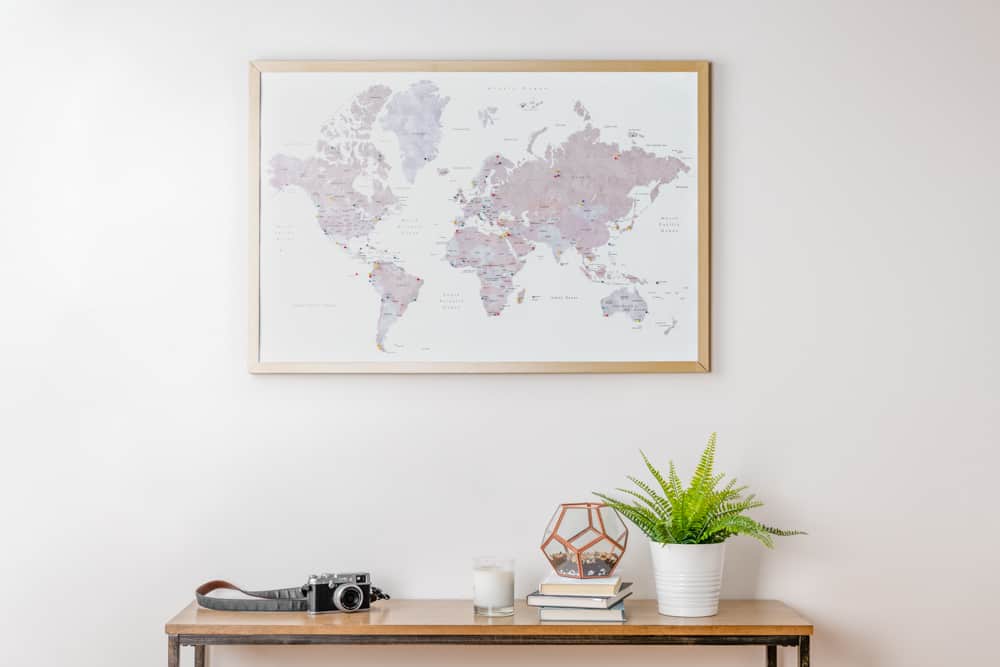
Now, the moment you’ve been waiting for: it’s time to hang up your map and show off your wanderlust! Choose a space where your map can be clearly seen and decorate it with household items and trinkets you’ve collected throughout your past travels.
A DIY travel map gives a unique touch to your home. It’s a reminder of favorite travel experiences and those that are yet to come. Whether you’re going for an antique, mid-century or modern look, there are a variety of prints and frame options out there that can help make a map unique to your travel style. From road trips to overseas adventures, you now have a single location to display all your travels.
Happy pinning, and remember, not all who wander are lost!
We’ve been on the road over a year – I need to make this! My kids get confused where we are:)
Oh, I love this idea. Such a great way to document all our family vacations!
I have seen so many different versions of this to buy – but I really like the DIY option! It makes it that much more personal and special.
NICE