

Paper crafts for kids allows your kids to fully become creative in a whole new way! They will love these fun projects to do with you and the family.
The best part is that paper crafts require minimal supplies, and they are things that you already have around the house. So you don’t have to make any special trips to the store to be able to create a little bit of fun for kids.
Benefits of Paper Crafts
There are so many benefits of Paper crafts! As your child creates their imagination is growing so rapidly. Not only that though, but they are also able to use their fine motor skills through drawing, cutting, and gluing.
Another benefit you will find is that most paper crafts are good for the environment because they are using recycled materials like toilet paper rolls, egg cartons, milk jugs, old cans, and more.
If you are looking for more fun crafts to do with kids, check out our Space Crafts for Kids and Winter Themed Crafts for Kids for more ideas!
General Supply List for Paper Crafts
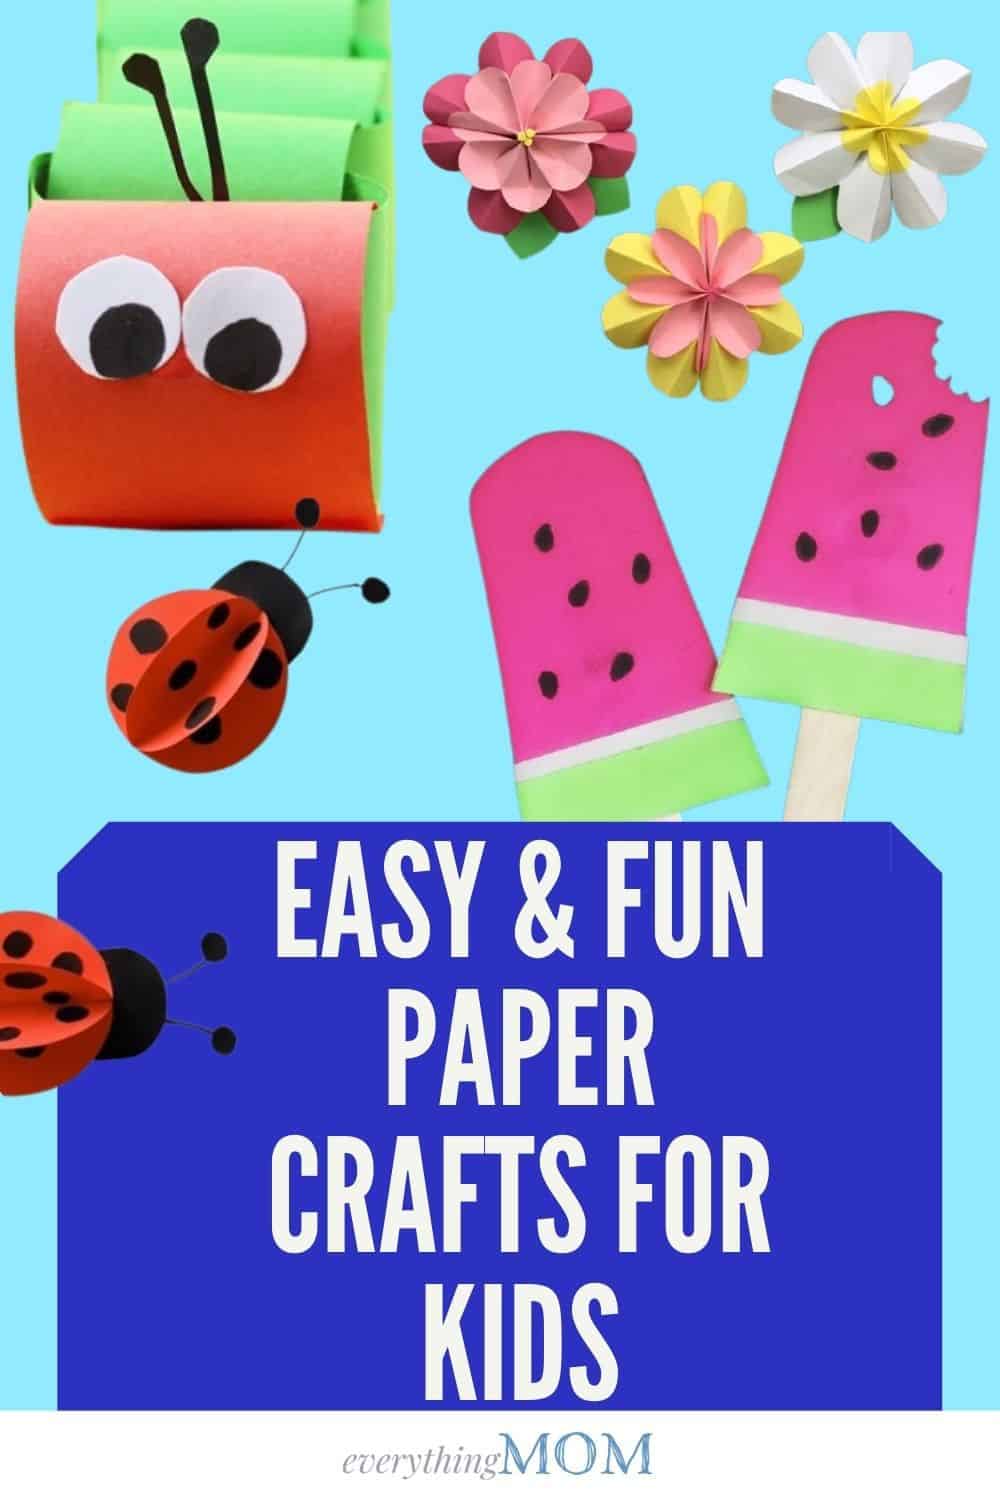
5 Paper Crafts for Kids They Will Absolutely Love
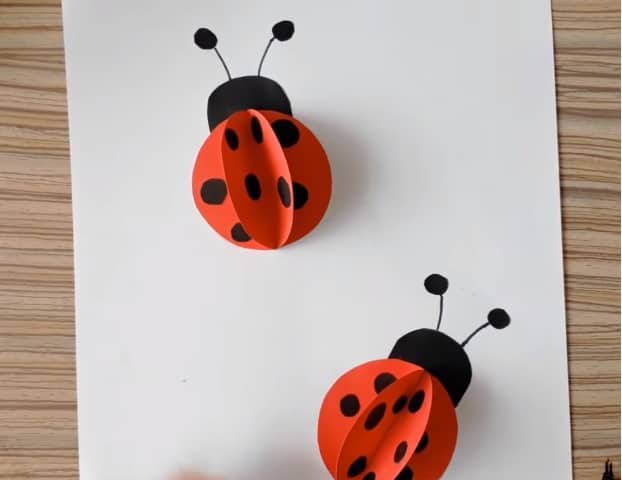
#1. Ladybug Paper Craft for Kids
Supplies Needed
- Colored Paper or Construction Paper
- White Paper
- Circle Puncher
- Glue Stick
- Googly Eyes
- Black Marker
- Scissors
This is a really cute paper craft to do with kids of all ages when spring is coming!
How to Make Your Ladybug
- First, you need to punch 4 circles from each color of paper you will be using to make the ladybugs with your circle/hole puncher.
- For each color of paper, fold 3 of the 4 circles you made in half.
- For 2 of the circles that are folded in half, put a little bit of glue on one of the folded sides.
- Now you will want to take the two halves that you put glue on and stick them to your full circle so that both halves with glue on them match up with the full circle.
- Then you need to get your last folded circle and put glue on both halves. Put this on top of the halves you just glued to the full circle.
- To decorate, draw black dots on the wings (colored paper) of the ladybug.
- On your white paper, draw a little half circle for the head and glue it to the bottom of the wings. Color this black.
- Add some googly eyes by gluing them to the little head you just added.
And there you have it! An adorable ladybug.
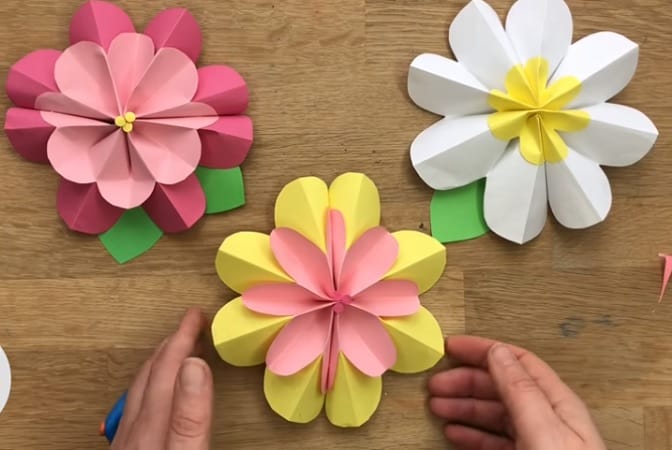
#2. Spring Flower Paper Craft
Supplies Needed
- Circle Punch
- Colored Paper or Construction Paper
- Yellow Paper
- Scissors
- Glue Stick
- Paper Drinking Straws
- Tape
This paper craft may be best for kids that are a little bit older and have more fine motor skills developed.
How to Make Your Spring Flower Paper Craft
- First, you will want to get your yellow paper and punch out as many circles as you want to make flowers with your circle puncher.
- Next, you will cut several strips of paper that are the same length and width to make the petals of your flowers. The easiest way to do this is to cut the paper width-wise so you don’t have to experiment with different lengths.
- Loop your strips of paper in half and glue the ends together.
- Now you will take the yellow circle you punched out at the beginning and glue your loops to the circle. A tip to make it a little easier to fit lots of petals without it getting uneven and crowded is to glue one loop down and then glue another loop directly across from it and fill in like that for each petal as you go.
- Lastly, get your paper straw and put a little bit of glue to secure it in place to the back of the flower, along with some tape to keep it all together.
Now your paper flower is all done! It’s the perfect craft to pair with the cute ladybugs you made above.
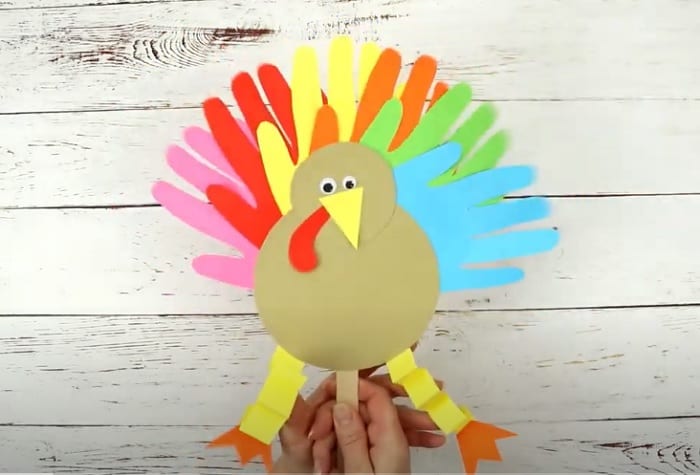
#3. Handprint Turkey Paper Puppet
Supplies Needed
This is a fun craft that would be great as part of a Thanksgiving unit or even just for a fun thing to make with handprints.
How to Make a Handprint Turkey Paper Puppet
- First, trace and cut out 3-4 handprints on different colored cardstock paper.
- Next, create a template for a head and body by punching a circle for the head and drawing a triangle to cut out for the body.
- For the feet, draw 2 little legs with chicken feet and cut them out.
- Now you can do the head feathers by cutting a rectangle and cutting slits to make the paper flange out.
- You need to make a beak with a smaller triangle cut out to glue to the front of the head.
- Next, layer the different colored handprints you cut out and glue them on top of one another to create a tail feather look.
- Once all your handprints are glued on top of one another, glue the head and body with the large triangle below. Then glue the beak on the circle and put the googly eyes to make the face for the turkey. Put your feet on the bottom with some glue as well.
- For the last step, get your craft stick and glue it to the back to make the turkey easy to hold.
Now you have a cute paper turkey puppet to play with for fun or even for Thanksgiving!
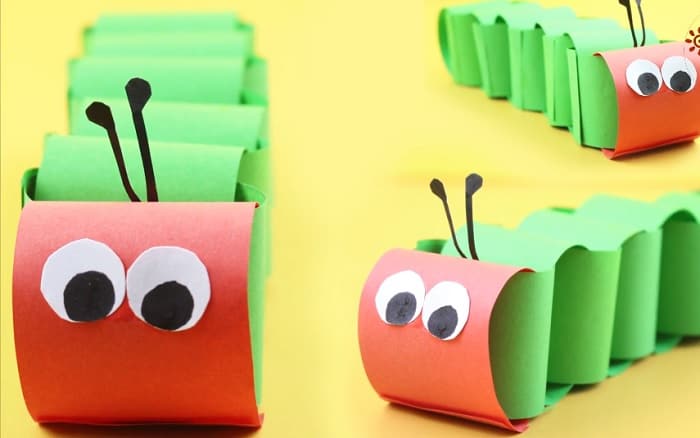
#4. Caterpillar Paper Craft
Supplies Needed
This is a fun craft to pair with the book The Very Hungry Caterpillar.
How to Make a Caterpillar Craft
- First, punch out 5 large circles with your circle cutter.
- Glue each circle together side by side. Only put glue on half of the circle to help with the circle not overlapping too much.
- On the face, glue 2 googly eyes and draw a nose and mouth.
- For the legs, draw 4 little black lines on the circle right after the head and 2 the last circle.
And there you have it! A fun and simple craft that even the youngest of kids can do and recognize.
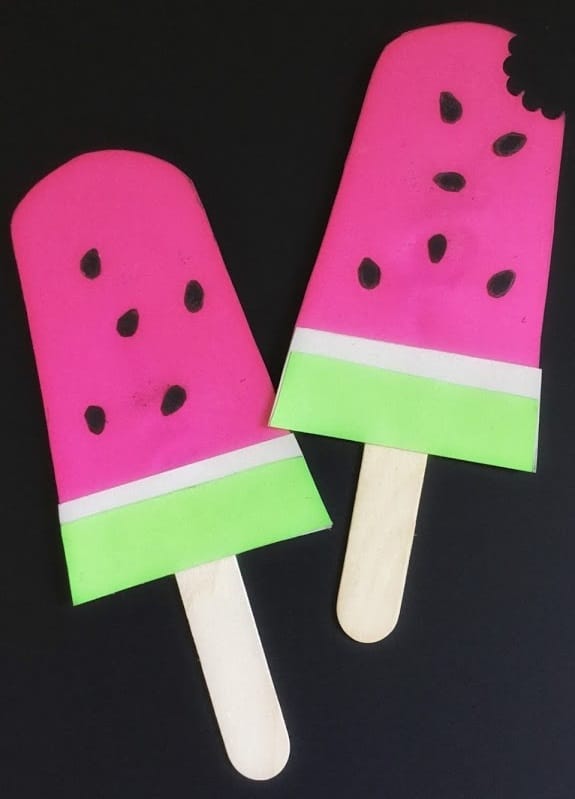
#5. Watermelon Popsicle Paper Craft
Supplies Needed
How to Make a Watermelon Popsicle Paper Craft
- On a piece of red paper, draw a long bell shape and cut it out.
- Draw and cut out 2 rectangles that are the width of the bottom of the bell shape in white and green.
- On a black piece of paper, cut out several seeds.
- Next, layer the white piece of paper on top of the pink one at the bottom and glue it on. Glue the green rectangle on top of the white piece of paper.
- Take the black seeds and glue each of them on the red paper.
- Finally, on the back of the popsicle, glue on the craft stick.
There you go! A fun take on a popsicle for those hot summer days.
If you have artistic kids at home that enjoy cutting and gluing. These are the perfect crafts for them to do on a rainy day.
Love this post? Try these other great posts!